
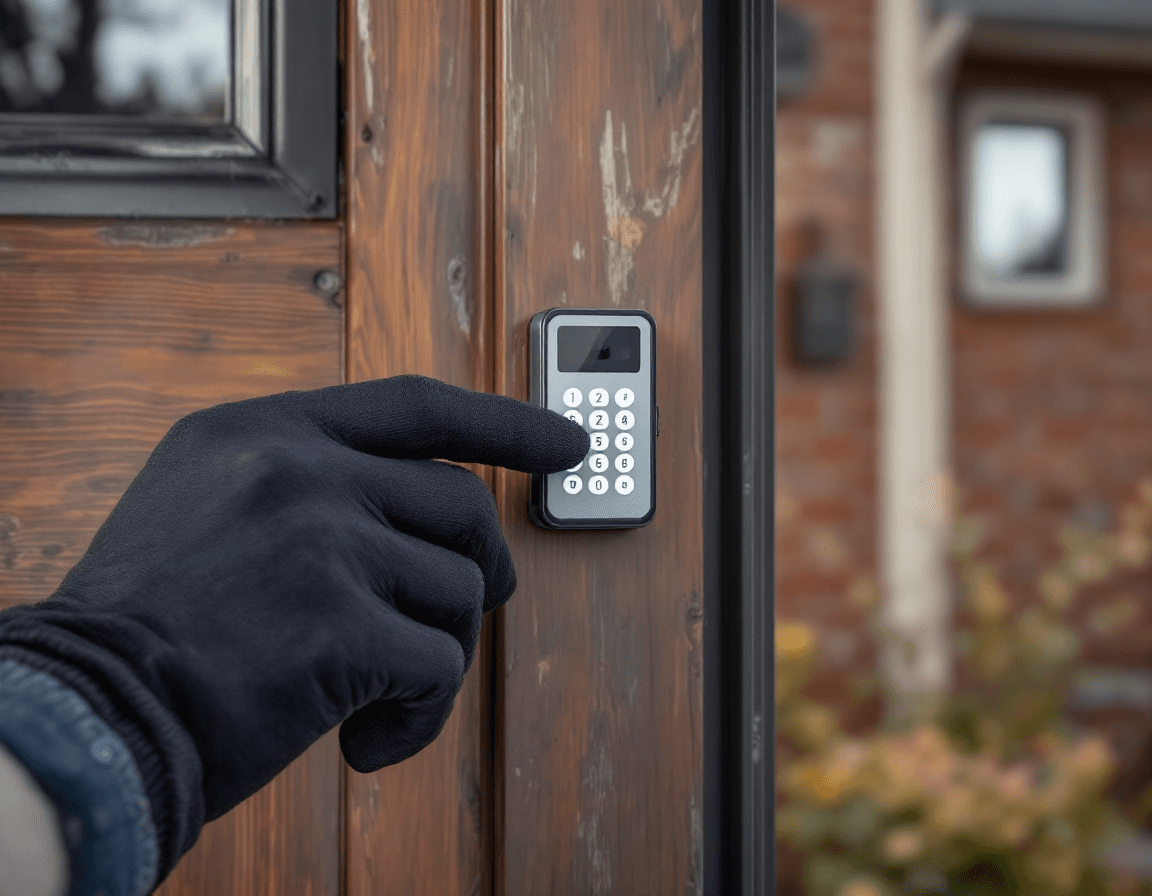
Garage door remote and keypad service in Mercer Island, WA covers a small repair with a big payoff. When a remote drops out at the end of a long day or a keypad rejects a code you've used for years, the garage door becomes an obstacle instead of a convenience. Mercer Island homes, from the older split-levels near the Town Center to the newer hillside builds facing Lake Washington, often have their openers mounted high in attached garages with long driveways, so a remote that works at the curb can fail in the driveway. Seattle Garage Door Fix handles these problems every week for homeowners across the island and the surrounding King County neighborhoods.
Most remote and keypad calls begin with a simple question: why did it stop working now? The answer is usually some combination of a weakened battery, a worn button contact, a receiver that has lost its memory, or a signal that is being blocked or confused by something in the environment. A technician can usually narrow it down in a single visit by checking the remote, the wall console, the receiver, and the keypad in sequence. This page explains what we check, what we fix on the spot, what it costs, and when a replacement part is the more sensible choice.
Our pricing for remote programming, keypad installation and troubleshooting, and in-car opener pairing falls between $65 and $185, depending on how many devices are involved and how much diagnostic work the system requires. That price does not include a new remote or keypad, which are priced separately so you can choose the hardware that fits your home and budget. The sections below walk through the common symptoms we see on the island, the reasons behind them, and the practical steps that will keep your controls reliable through the wet months ahead.
Why Island Remotes Die Faster Than the Brochure Says
Garage door remotes on Mercer Island tend to wear out sooner than the battery life printed on the package suggests. Most remotes run on a small coin cell, typically a CR2032 or a similar 3-volt lithium battery, and those cells are sensitive to temperature swings. A remote kept on a damp entry table in a home with a cold garage, or one that lives in a car door pocket through a cool Puget Sound winter, can lose capacity much faster than one stored in a dry drawer. Many of the remotes we open have a rust-speckled battery contact, which is the direct result of humidity getting into a plastic housing that was never sealed for it.
The Pacific Northwest climate adds several other stresses. Our winters are damp rather than bitterly cold, which means condensation can form inside a garage on mornings when the temperature drops overnight and then climbs by midday. Attached garages on the island often sit next to laundry rooms, mudrooms, or water heaters, which keeps the air humid all year. Moisture works its way into the small button pads and printed circuit boards of inexpensive remotes, and the buttons begin to feel mushy or only register when pressed at a certain angle. A remote that works perfectly in July can behave strangely in February, and the humidity is often the real culprit.
Distance and obstacles matter here too. Many island driveways are long, curved, or cut into a slope, so the remote may be operating at the edge of its useful range when you pull up to the house. Thick stucco walls, metal-framed garage doors with foam cores, and nearby electronics such as a wireless doorbell, a home security transmitter, or a neighbor's gate opener can all interfere with the signal. A good technician separates a true equipment failure from a range or interference problem before recommending any part, which saves you money and avoids replacing hardware that was working fine all along.
Reading the Signs: Intermittent Remotes and Dead Batteries
An intermittent remote is one of the most frustrating symptoms because it works sometimes and fails at other times, which makes it hard to know whether the problem is the remote, the opener, or the timing of your button press. In our experience, the first thing to check is the battery, even if you replaced it recently. A battery that tests fine on a meter can still have too little current to send a strong signal over a long distance, especially once temperatures drop. Swapping in a fresh battery of the correct type, and making sure it sits firmly against both contacts, resolves a surprising number of calls.
If a fresh battery doesn't help, the next suspect is the button itself. Press each button several times and watch the indicator light. If one button responds only when pressed firmly or from a specific angle, the internal contact is probably worn or corroded. Remotes that have been dropped, left in a hot car, or exposed to rain often show this behavior. Repairing the contact is sometimes possible, but for inexpensive remotes it is usually more economical to replace the unit entirely.
Some intermittent failures come from the opener side rather than the remote. The wall console or the receiver's antenna wire may be loose or damaged, and vibrations from the door can make the connection drop in and out. Our technicians test the receiver's response with a known-good transmitter during the visit, which quickly reveals whether the weakness lives in the remote or in the opener's receiving system.
- Replace the battery with the exact type printed on the remote, and confirm it seats firmly against both contacts.
- Try the remote from the driveway, the sidewalk, and inside the garage to see whether the problem depends on distance.
- Note whether one button fails while the others work, which usually points to a worn button contact.
- Check whether the failures cluster around certain times or weather, which can indicate interference from nearby devices.
- Inspect the opener's antenna wire for kinks, breaks, or a loose connection at the head unit.
Programming a Remote Without the Guesswork
Remote programming is one of the easiest jobs in garage door service when the opener is cooperative, and one of the more frustrating when it is not. Most modern openers have a "Learn" button on the motor unit, usually near the antenna wire, sometimes behind a cover or a panel of the head unit. Pressing it briefly puts the opener into learning mode, and then pressing the button on the new remote within about 30 seconds teaches the opener to respond to that remote's code. Many openers also indicate learning mode with a small indicator light that blinks or glows steadily, so watch for that light before pressing the remote.
Where programming goes sideways is usually in the details. Some openers accept only a limited number of remotes, and once the memory is full, a new remote will not sync until an older code is cleared. Certain older openers use different radio frequencies, commonly 315 MHz or 390 MHz, and a remote built for one frequency will not talk to an opener built for the other. Rolling-code systems also require the remote and receiver to stay in step, so a remote that has been pressed many times out of range may need to be resynchronized. A technician who knows the brand and model can usually work through these issues quickly.
If you want to try programming yourself, start by checking the model number on the motor unit and locating the manufacturer's instructions online or in the original paperwork. Make sure the ladder or step stool is stable, and keep the door in view as you work. Never reach into the door's tracks, springs, or cables during programming, because the door can move unexpectedly while the opener is in a learning state. If the opener doesn't respond after two or three attempts, stop and call a licensed technician rather than repeating the same steps.
Choosing a Replacement Remote Without Overpaying
When the old remote is beyond repair, choosing a replacement involves more than picking the cheapest option online. The most important detail is compatibility. Your replacement must match the frequency, the encoding system, and the brand family of your opener, because a generic remote that looks identical can still fail to communicate with the motor. Bring the opener model number or the old remote to the appointment, and we will confirm the correct replacement before ordering.
Multi-button remotes give you more flexibility, since one remote can operate two doors or a gate in addition to the garage. Some homeowners prefer a visor-clip remote so the opener lives in the car, while others want a smaller key-fob style that fits on a keyring alongside house keys. Several Mercer Island households have asked about remotes that work with both a garage opener and a separate gate, and those setups generally require a compatible model and a clear programming plan before installation. We will explain the tradeoffs honestly and let you decide what fits your household.
Replacement remotes vary a great deal in quality, and the difference often shows up in the buttons and housing rather than the electronics. A well-made remote with a sealed housing and firm buttons will hold up better through humid winters and resist the battery corrosion that plagues cheaper units. We are happy to discuss options that match your opener and your daily routine, and we will avoid recommending a higher-priced unit when a standard replacement will do the job.
Exterior Keypads on Island Driveways: Placement and Weather
An exterior keypad gives you a way to open the garage without a remote, which is useful for family members, housekeepers, dog walkers, and anyone who sometimes forgets a remote in the car. Keypads are often mounted beside the garage door, on a wall near the walkway, or on a post at the edge of a long driveway. Placement matters more than most homeowners expect. A keypad mounted in a spot that catches direct sprinkler spray or the full force of a driving rain will wear out quickly, and a keypad hidden behind a shrub may be difficult to reach in the dark.
Our wet climate means the keypad's weather rating deserves attention. Look for a unit designed for outdoor installation, with a sealed housing and a backlit or illuminated keypad that remains readable at night. Wiring also needs care: exterior connections should be protected from moisture, and any low-voltage cable run should be secured so it does not sag, pinch, or collect water. A technician will check the sealing around the mounting bracket and the wire entry point, since those are the spots where water most often finds its way in.
Keypad codes deserve thought as well. Choose a code that is memorable to family members but not obvious to strangers, such as one that avoids birthdays, house numbers, or simple sequences. Many keypads allow you to set multiple user codes, which is helpful if you want to give a cleaner or caregiver temporary access without sharing your primary code. Our technicians can walk you through setting, changing, or removing user codes, and we can help you decide where the keypad should go so it serves the household rather than just the driveway.
When a Keypad Refuses Your Code
A keypad that rejects a code you know is correct is a common complaint and usually has a manageable cause. The first possibility is simply input error: some keypads require the code to be entered in a particular sequence or with a specific confirmation button, and a small timing mistake can cause a rejection. Give the keypad a moment to reset after an incorrect attempt, since many units lock out briefly after several failed tries. If the keypad is wired rather than wireless, check that the power supply is steady and that the buttons respond with a clear beep or light.
Corrosion and moisture are the next likely suspects, especially on keypads that have been exposed to a season of rain. Water inside the housing can cause some buttons to register intermittently or not at all, and a keypad that looks dry on the outside may still have damp circuitry inside. Pressing each key and watching for a consistent response will often reveal a problem key, and a technician can open the unit to check for corrosion without damaging the seal. Dirt, leaves, and fine grit from the driveway can also wedge under the keys and cause sticking.
Sometimes the keypad is healthy but the opener's memory has been reset or changed. A power outage, a firmware update, or a recent remote programming session can overwrite the stored keypad code. In that case, the keypad needs to be re-enrolled with the opener, which is often a short procedure once the correct sequence is known. Our technicians test both the keypad and the opener during the same visit, so we can tell you exactly which component needs attention.
Syncing the Car's Built-In HomeLink Buttons
Many Mercer Island drivers rely on a built-in garage opener in the car, usually labeled HomeLink, Car2U, or a similar brand, and these systems can be a convenient alternative to a separate remote. Pairing them with your garage door opener is usually straightforward when the opener is compatible, but the process differs by vehicle make and model. Some cars use a learning sequence that involves holding the built-in button while pressing the opener's Learn button, while others require a specific ignition position or a short wait between steps. Your vehicle's owner's manual is the best starting point, and it often includes a diagram for the opener's learning process.
Compatibility is the main obstacle. Some newer openers use rolling-code systems that certain vehicle systems handle differently, and some older vehicles were built with fixed-code systems that cannot be paired with modern openers. The vehicle's built-in opener may also be limited to a certain number of buttons or doors. When a pairing fails, the most useful information is the year, make, and model of the car, along with the brand and model of the garage opener. We can usually determine whether the pairing is possible before attempting it, which saves time and frustration.
Pairing can also be affected by the car's position and the opener's signal strength. Park the vehicle close enough to the door to ensure a strong signal during learning, and avoid pairing in a crowded garage where other electronics might interfere. Once the buttons are programmed, test them from both the driveway and the street to confirm the range is adequate. If the car's system is unreliable, a standard remote clipped to the visor is a dependable backup that never needs a dashboard setting.
Lost Remote, Lost Peace of Mind: Clearing Old Codes
A lost remote is more than an inconvenience. Anyone who finds it can use it to open your garage, so clearing its code from the opener should be a priority. Most garage door openers allow you to erase all stored remote codes at once by pressing and holding the Learn button on the motor unit until the indicator light goes out or the opener confirms the memory has been cleared. The exact duration varies by brand, so check the manual before pressing, and remember that clearing all codes means every remote, keypad, and car system will need to be reprogrammed afterward.
The sequence usually goes like this:
- Locate the Learn button on the opener's motor unit and confirm its brand and model.
- Press and hold the Learn button until the indicator light turns off or changes color, which typically takes several seconds.
- Release the button and confirm that the old remote no longer operates the door.
- Reprogram each remote you still have, then reenroll any keypad and in-car system.
- Test every device from inside the garage and from the driveway before assuming the process is complete.
Clearing codes is a sensible step after a lost remote, but it does not fix the underlying issue of an opener that is aging or a keypad that is exposed to weather. If the opener is more than a decade old or the rail, chain, or safety sensors show wear, now is a good time for a broader inspection. Because we are a garage door company, we keep the conversation focused on your system's overall reliability and never push unnecessary repairs. If you are unsure whether the opener is still under warranty or whether a newer model would be a better long-term choice, we can help you weigh the options.
What a Remote and Keypad Visit Covers
A typical service visit begins with a short conversation about the symptoms you are seeing and how the system is used day to day. The technician then tests the opener, the wall console, the remote or remotes, and any keypad or in-car system, checking for battery condition, signal strength, and the status of each stored code. This diagnostic step is what separates a quick, accurate fix from a series of guesses. We will tell you what we find before doing any work that goes beyond the original request.
Pricing for remote programming, keypad installation and troubleshooting, and in-car opener pairing ranges from $65 to $185, depending on how many devices need attention and how complicated the programming sequence is. Replacement remotes and keypads are separate and quoted based on the exact hardware you choose. For a simple reprogramming job on a common opener, the cost tends to sit at the lower end of the range, while a multi-device setup, a keypad installation with new wiring, or a vehicle that requires extra steps will move toward the higher end. We aim to give you a clear estimate before we start.
Our technicians are licensed, bonded, and insured, and we follow safe procedures on every job. Remote and keypad work does not require adjusting the door's springs or cables, and we will never ask a homeowner to attempt spring or cable work. Those components store substantial tension and must be handled only by a licensed professional with the right tools and training. If your visit reveals a worn spring, a frayed cable, or a damaged track, we will explain the issue and recommend the appropriate next step.
Keeping Remotes and Keypads Reliable Through Wet Seasons
Preventive care can extend the life of your remotes and keypads considerably. Keep spare batteries in a dry location inside the house rather than in the garage, and replace remote batteries on a regular schedule rather than waiting for the first failure. If you keep a remote in the car, consider a sealed holder or a small pouch that keeps moisture and direct sunlight away from the housing. Wiping down the buttons and keypad with a dry cloth every few months removes grit that can work its way into the keys and make them stick.
For exterior keypads, check the seal around the housing at the start of each rainy season and look for signs of water staining, cracked gaskets, or loose mounting hardware. If the keypad is near a sprinkler head or a downspout, redirect the water or move the unit to a drier spot. Trim back shrubs and vines that brush against the keypad, especially after the spring growth period, since moisture trapped against the housing accelerates corrosion. A quick inspection after a windstorm can catch loose wiring or a displaced cover before it turns into a larger problem.
Finally, keep a simple record of your remote and keypad codes and which devices are programmed to the opener. This makes it much easier to recover after a lost remote, a power outage, or a change in household members. If you move or hand the home to a new owner, clear the old codes and reprogram the system so every device in use is one you trust. Whenever a remote, keypad, or in-car system starts behaving oddly, call (888) 799-3819 and we will help you sort out whether the fix is a quick reprogramming or a part that needs replacing.
If your garage door remote is failing, your keypad won't accept your code, or you need to re-secure your garage after losing a remote, Seattle Garage Door Fix is ready to help Mercer Island homeowners get back to reliable access. Call (888) 799-3819 to schedule a visit, and our licensed, bonded, and insured technicians will diagnose the problem, explain your options, and get your controls working again.