
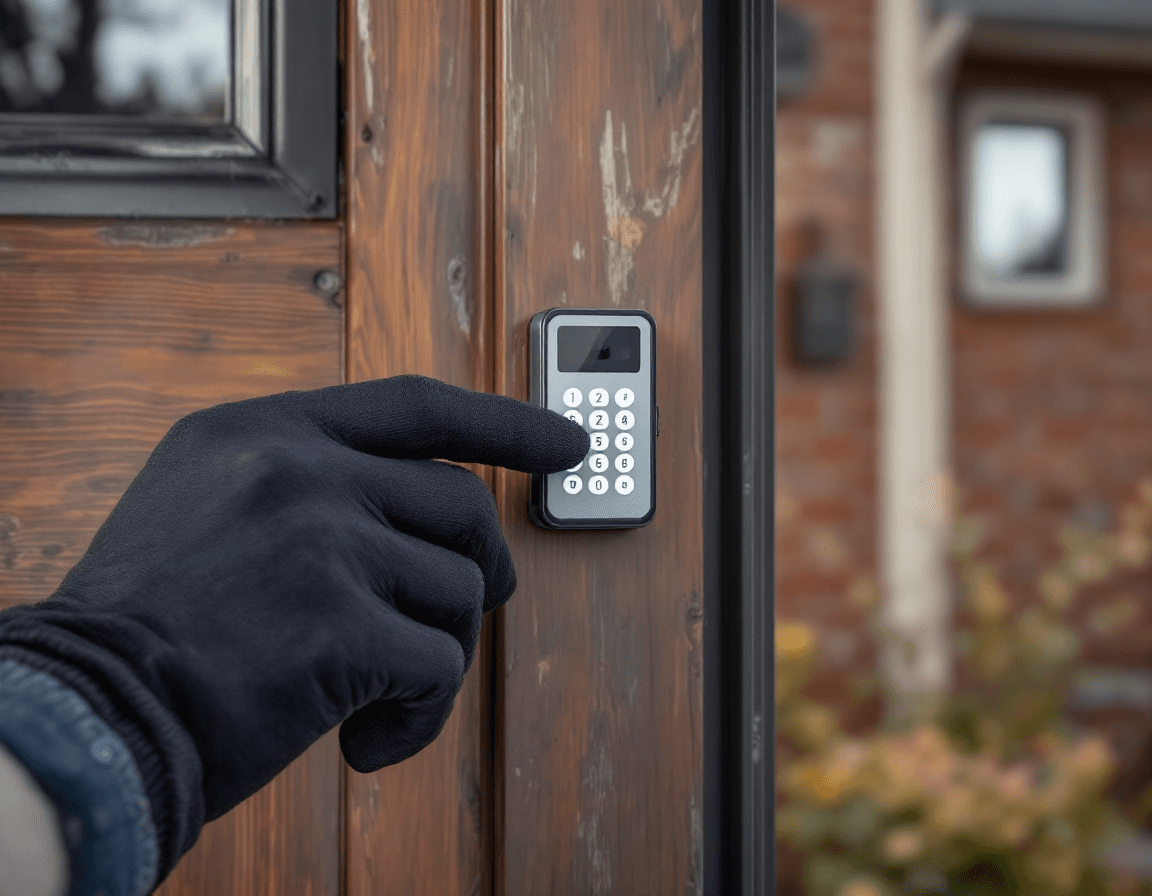
Garage Door Remote & Keypad Service in Mountlake Terrace, WA covers one of the most common and most frustrating problems homeowners run into: the button that used to open the door now does nothing, or the keypad by the side entry rejects a code you're sure is correct. Around Mountlake Terrace, a remote or keypad can fail for reasons that have less to do with the opener itself and more to do with the local weather, the age of the hardware, or a previous owner's setup. Most of these issues are fixable in a single visit without replacing the opener, and many can be diagnosed in a few minutes once someone knows what to check. This page explains how remote and keypad problems typically show up in our part of Snohomish County and what a practical repair looks like.
Homes here range from mid-century ranch houses near Lake Ballinger to newer townhomes close to the MLT Town Center, and each layout affects how a remote signal travels. A garage that sits deep behind a long driveway, or one with a metal roll-up door and a concrete wall between the car and the opener, may need a different approach than a detached garage with a single window. Whatever the house, the goal is the same: get the door responding reliably, make sure only the people you intend can operate it, and leave you with a clear understanding of what was done. Our technicians are licensed, bonded, and insured, and they treat remote and keypad work with the same care they bring to larger repairs.
Pricing for this kind of visit generally falls between $65 and $185, depending on what's needed, and that range doesn't include a replacement remote or keypad if one is required. Some calls take only a few minutes of reprogramming, while others involve testing the receiver, cleaning contacts, or installing a new exterior keypad with its own wiring. The sections below walk through the most common situations, what to check on your own, and where a professional should take over.
Why Remotes Keep Failing During Wet Pacific Northwest Winters
Western Washington's damp, mild winters are hard on small electronics, and a handheld remote is about as exposed as a device can be. It rides in a car cup holder, sits on a kitchen counter next to a coffee maker, and sometimes gets left on a porch railing during a February drizzle. Moisture can creep into the battery compartment and corrode the contacts, and condensation inside a poorly sealed case can interrupt the circuit board long before the battery is dead. Many homeowners in the Mountlake Terrace area notice that their remote works fine in July and starts acting up once the rainy season settles in.
Temperature swings add another layer. A remote that spends a cold night in an unheated car and then comes inside to a warm, humid kitchen can collect condensation on the internal components. The button membrane may feel sticky or fail to make full contact, which makes the remote seem to work only when pressed at a particular angle. This is why people often describe the problem as intermittent: the remote works when it's warm and dry, then fails on a damp morning.
Wet weather also affects the receiver side of the system. Exterior keypads, wall-mounted sensors, and safety-sensor wiring are exposed to rain, and their connections can loosen or corrode over time. A keypad that sits in direct exposure near a driveway may accept codes inconsistently after a few wet seasons, even though nothing about the code itself has changed. Knowing that these environmental patterns exist helps a technician focus on the most likely culprits rather than replacing parts at random.
Diagnosing an Intermittent Remote Before You Buy a Replacement
Before spending money on a new remote, it's worth running through a short list of checks. Many intermittent problems turn out to be simple, and a few minutes of testing can save a return trip or an unnecessary purchase. You don't need special tools to start, though a technician will have a multimeter and a signal-testing setup if the basics don't resolve the issue.
- Replace the battery with a fresh one of the correct type, and check whether the remote was opened recently by someone who may have bent the contacts.
- Look inside the battery compartment for green or white corrosion, and gently clean the contacts with a dry cotton swab if you see any.
- Stand at the spot where you normally press the button, then try from a few feet closer and a few feet farther to see whether range is the real issue.
- Test the remote in a dry location after it has been in a cold or damp environment for several hours, since condensation often resolves once the case warms up.
- Check whether the opener's indicator light flashes when you press the button; a flash means the signal is reaching the unit, which points away from the remote and toward the receiver or the wall-mounted control.
If the remote passes these checks but the door still responds inconsistently, the receiver antenna wire may be damaged or the opener's logic board may be failing. Antenna wires are often tucked behind a light fixture or along the rail, and a kink or a pinched section can reduce range dramatically. A technician can inspect the antenna, test signal strength, and tell you whether the problem is worth fixing or whether a board replacement is the more sensible long-term option.
Reprogramming a Remote the Right Way
Reprogramming is the most common remote service we handle, and it's often the fastest fix. The process depends on the opener brand, the year it was installed, and whether the system uses fixed codes or rolling codes. Most modern openers use rolling-code technology, which changes the transmitted code every time you press the button, so the opener and remote must be synchronized through a learn button on the motor unit. The learn button is usually located near the antenna wire, often behind a small cover or under the light lens, and pressing it briefly puts the opener into learning mode.
Once the opener is in learning mode, you press the button on the remote you want to program, and the opener confirms the match with a light flash or a short sound. Some systems require you to press the remote button several times, and some require you to wait a set period between presses. Older units may need a different sequence, and some very early openers use DIP switches that must match the remote's internal settings. Because the steps vary, the instruction sheet that came with your opener is the best reference, and our technicians carry manuals for most common brands.
Reprogramming also gives you an opportunity to clean up old access. If a remote was lost, sold with a car, or given to a former tenant, the opener may still accept its code. Many openers allow you to erase all stored remotes at once by holding the learn button for a set period, and that step is worth doing whenever you're uncertain who still has access. We'll walk you through which remotes should remain active and which should be cleared, so the reprogramming visit doubles as a basic security check.
Choosing a Replacement Remote Without Guesswork
Buying a replacement remote can feel confusing because remotes are not all interchangeable. The frequency, the code type, and the button count must match the opener, and a remote designed for a different brand may not work at all. Frequency is commonly 315 MHz or 390 MHz in the United States, and using the wrong one will result in a remote that never connects. The model number printed on the motor unit or in the manual is the most reliable way to identify compatible replacements.
Some homeowners want a remote that does more than open the door. Multi-button remotes can control a second door, a gate, or a light, and some models pair with smartphone apps or home automation hubs. Those features are convenient, but they also add complexity, and it's worth confirming that the remote supports the specific functions you need before buying. A technician can recommend a model that fits your existing opener and explain whether an upgrade is practical or whether the system needs a newer motor first.
If you're replacing a remote because the old one was lost, consider whether you also want to replace the keypad code or change the lock settings. Keeping the old remote's programming in the opener is the most common oversight after a loss, so pairing the new remote should always be followed by a full review of what remains active. This is a small step that significantly reduces the chance of someone unexpectedly opening the door later.
Keypads That Refuse Your Code
A keypad that won't accept a code is one of the more puzzling problems because the keypad appears to work, with lights and beeps, but the door stays closed. The most common explanation is that the keypad has been locked out after too many incorrect entries, which is a deliberate safety feature on many models. Lockout periods vary, and some keypads require a reset procedure rather than waiting. Other causes include a weak battery in a wireless keypad, a loose wire in a wired model, or a code that was changed during a previous service and never written down.
In the Mountlake Terrace area, exterior keypads are frequently mounted on a post or wall facing the driveway, which means they take the brunt of rain, wind, and temperature swings. Water can get behind the keypad face and short the circuit, and the buttons may swell or stick after a long wet season. If the keypad responds to some buttons but not others, the membrane or contact pad is a likely suspect. A technician can open the housing, check the connections, and determine whether the keypad can be repaired or should be replaced.
Keypads also depend on the opener's receiver. If the keypad is wireless and the signal is blocked by a metal door, a thick wall, or interference from nearby devices, the code may be transmitted but never received. Testing the keypad close to the opener is a quick way to tell whether the issue is the keypad itself or the signal path between the keypad and the motor unit.
Adding an Exterior Keypad Near the Driveway or Side Entry
Many households want a keypad so that family members, babysitters, or contractors can enter without a remote. Adding one is a practical upgrade, especially for homes where people frequently arrive on foot through the side yard or where the garage is used as a second entrance. The location matters a great deal. The keypad should be reachable from the sidewalk or driveway without requiring the user to stand in standing water, and it should be placed where it won't be hit directly by a car door or a sprinkler line.
Wireless keypads are the simplest option because they don't require new wiring between the keypad and the opener. They run on batteries and communicate through a radio signal, so the main planning question is whether the keypad can reach the receiver through the walls and garage door. Wired keypads offer more reliability in some installations but require a run of low-voltage cable and careful routing to protect it from moisture. For homes with long driveways or detached garages, a wired option may be the better long-term choice even though installation takes longer.
Whichever type you choose, programming the code and setting the lockout behavior are important steps. Choose a code that is not your house number, your birthday, or a sequence that's easy to guess, and make sure the keypad's light and tamper settings are configured the way you want. Our technicians will program the code with you present so you can confirm it works before the visit ends, and we'll explain how to change it later if a household member moves out.
Pairing Your Car's HomeLink Buttons With the Opener
Many vehicles built in the last couple of decades include a built-in universal transmitter, often branded HomeLink, that can open a garage door without a separate remote. Pairing it can be straightforward or frustrating depending on the car and the opener. The general approach involves holding the car's HomeLink button while pressing and holding the learn button on the opener's motor unit, then pressing the car button again when the opener indicates it's ready. Some vehicles require the engine to be running, and some use a slightly different sequence for rolling-code systems.
The most common pairing problem is confusion about which button in the car to use. Many cars have three buttons, and each can be programmed to a different door or device. Another frequent issue is that the car's manual uses a different procedure than the opener's manual, and following one while the other expects a different sequence can lead to a failed attempt. Some newer rolling-code openers require an extra step or a specific button hold time, and older cars may only support fixed-code systems. If the car's transmitter doesn't pair at all, a separate remote may be the more reliable solution.
Because the instructions vary so much, our technicians usually confirm your vehicle's year, make, and model before starting. We can also check whether the opener's firmware is compatible with the car's transmitter and whether any previous programming is interfering with the new pairing. If you sell the car or replace the vehicle, the HomeLink programming should be erased from the car's system, and we can advise you on how to do that safely so the old vehicle doesn't keep access to your garage.
Lost Remote or Stolen Access: How to Lock Out Old Codes
A lost remote is more than an inconvenience. Anyone who finds it, or who obtains it later, may be able to open your garage door, and that can expose tools, bikes, vehicles, and entry into the home. The first step is always to erase the opener's memory of the lost remote, which is why reprogramming and security cleanup usually happen together. Once the opener's stored codes are cleared, you'll need to program every remote you still want to use, and the lost unit will no longer work.
Here is a practical checklist for homeowners who suspect a remote is missing:
- Write down how many remotes and keypad codes you believe are currently in use, so you can compare that number after the reset.
- Ask family members and regular visitors whether they still carry a remote, and collect any you no longer need.
- Check the car's HomeLink programming and remove any old vehicles from the opener's memory.
- Change the keypad code if one was ever shared with a contractor, neighbor, or former tenant.
- Schedule a visit to clear all stored remotes and reprogram the ones you intend to keep.
Some homeowners wonder whether a lost remote means they need a new opener. In most cases it does not. Clearing the memory and reprogramming the active remotes resolves the security issue without replacing hardware. If the motor unit is old or the rolling-code system is outdated, a technician may suggest an upgrade for better security, but that decision depends on the opener's age and condition rather than the lost remote alone.
What a Remote and Keypad Visit Usually Includes
A typical service call for this kind of work begins with a conversation about the symptoms. We'll ask when the problem started, whether it affects every remote or only one, whether the keypad was changed recently, and whether anyone else has had access to the garage. From there, the technician tests the remote or keypad, checks the opener's learn button and indicator light, and inspects the antenna and wiring. Most visits focus on programming, cleaning, and minor adjustments, and the total time on site often ranges from about thirty minutes to an hour.
The price range of $65 to $185 generally reflects the time, travel, and complexity of the work, with the higher end usually covering installations, multi-device programming, or diagnostic work that takes longer. A replacement remote or keypad is billed separately, and we'll confirm the cost before ordering anything. If the diagnosis points to a larger repair, such as a failing logic board or a damaged receiver, we'll explain the options and the expected price before proceeding, so there are no surprises.
Every visit ends with a walkthrough of what was done and how to avoid the same problem in the future. That might mean storing remotes out of direct sun, replacing batteries on a set schedule, or keeping an exterior keypad covered from the worst rain. The goal is for you to leave with a door that responds reliably and a clear understanding of how the system works.
Safety Boundaries: What Stays With a Licensed Technician
Remote and keypad work is generally low-voltage and safe for a homeowner to observe, but it sits close to parts of the system that are not. Garage door springs, cables, drums, and the torsion or extension mechanisms store substantial energy and can cause serious injury if handled improperly. If a remote problem is caused by a door that is out of balance, binding, or fails to stay open, the cause is likely mechanical, and that work should be left to a licensed professional. Never attempt to adjust, tension, or remove a spring yourself, even if you feel confident about the task.
The same caution applies to wiring work near the motor unit and the main power supply. Our technicians follow standard electrical safety practices, and they'll disconnect power before working on the opener's internal components. If you're unsure whether a symptom is electrical, mechanical, or purely a programming issue, call before opening any panels. A short phone conversation can often identify the likely category and prevent an unsafe attempt at a fix.
We're happy to help you sort through remote, keypad, and HomeLink concerns for any home in Mountlake Terrace and the surrounding Snohomish County neighborhoods, including homes near Lake Ballinger and the MLT Town Center. If your remote has stopped responding, your keypad won't take your code, or you've lost a remote and want the door secured again, call Seattle Garage Door Fix at (888) 799-3819 to schedule a visit with a licensed, bonded, and insured technician.