
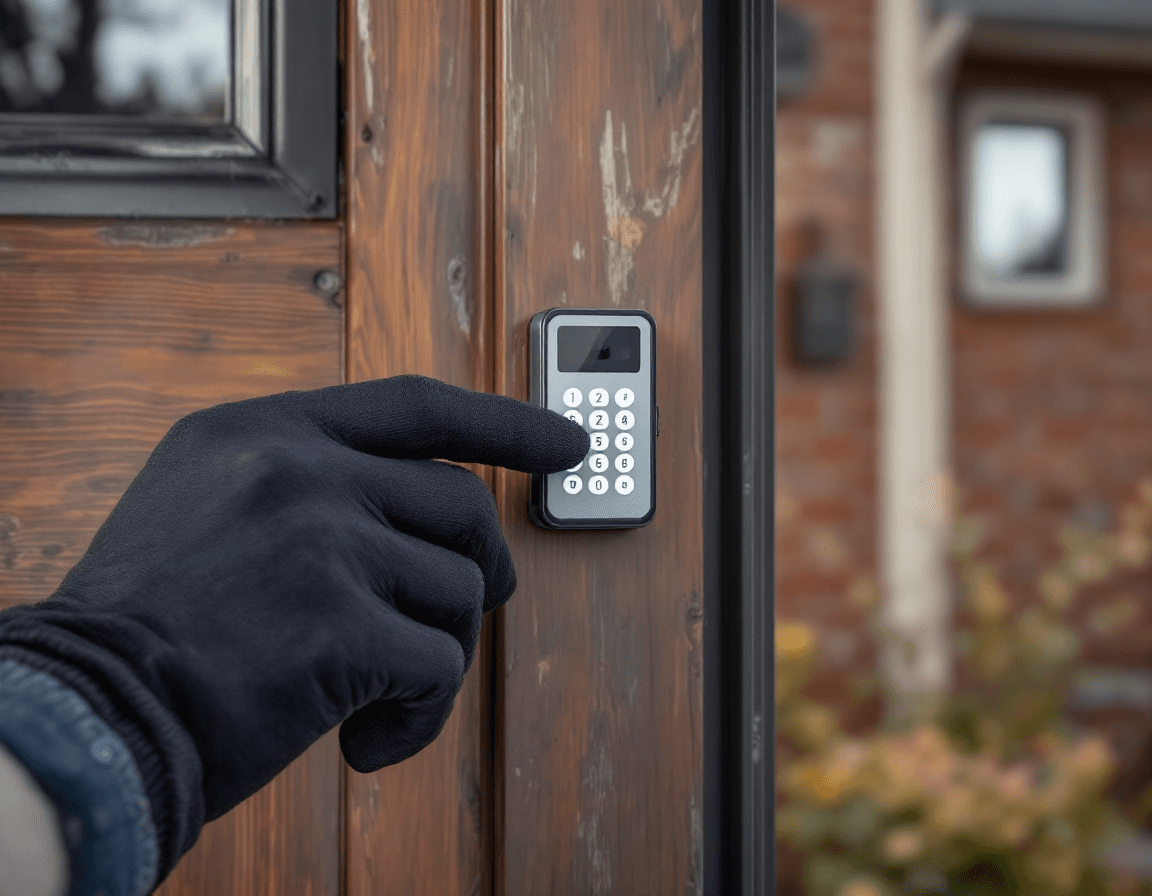
Garage Door Remote & Keypad Service in Shoreline, WA covers the small electronic devices that control one of the largest moving objects on your property, and they tend to fail in ways that are frustrating but usually fixable. Homeowners across Richmond Beach, Echo Lake, North City, and the neighborhoods around the 98133, 98155, and 98177 ZIP codes call us when a remote that worked all summer suddenly stops reaching the door from the driveway. Most of these problems come down to a handful of causes: worn batteries, moisture, a mismatched frequency, a keypad that needs reprogramming, or a car system that never got properly trained. A short visit can often sort them out without replacing the opener itself.
This page explains how remote, keypad, and in-car pairing work, what typically goes wrong in our part of King County, and what you can check yourself before calling. We also describe what a service visit includes and what it costs. Our pricing for remote programming, keypad installation and troubleshooting, and in-car opener pairing runs $65 to $185, plus the cost of any new remote or keypad you choose to add. Where a problem touches the door's springs, cables, or safety sensors, we will say so plainly, because those repairs belong to a licensed, insured technician and not to a DIY project.
Read through the sections that match your situation, or skip ahead to the one about lost remotes if you are worried about security right now. If you would rather have someone look at the system in person, call (888) 799-3819 and describe what the door is doing. A few details on the phone often tell us a lot about what to bring.
Why Remotes Give Up Faster Near Puget Sound
Living in Shoreline means living with a climate that is generally mild but persistently damp, and that dampness finds its way into electronics. The months of drizzle and gray skies between fall and spring leave a fine film of moisture on everything, and homes closer to the water in Richmond Beach feel the marine air more strongly than inland streets. Over time that moisture works its way into the battery compartment of a handheld remote, where it encourages corrosion on the battery contacts and the circuit board. A remote that was working perfectly in September can start cutting out by January even though nothing was physically damaged.
Keypads that mount outdoors face the same conditions, only without any shelter. The keypad's buttons and circuit are sealed to varying degrees depending on the model, and the cheaper units can let condensation collect behind the faceplate after a few wet winters. Corrosion on the contacts can make a digit register intermittently, which is why a keypad may accept your code on the third try but refuse it on the first. Keypads mounted on the street-facing side of a house also take a beating from rain driven by southwest winds, which is common in the Seattle area during the cooler months.
The receiver inside the garage is less exposed, but it is not immune. Garages in older Shoreline homes sometimes have poor ventilation, and a damp garage can cause the opener's wiring connections and antenna wire to degrade. We check the antenna and the receiver's connections during every visit, since a loose or damaged antenna can make an otherwise healthy remote seem unreliable. Routine attention to these small parts often prevents the kind of failure that looks like a bad remote but is really a weak signal path.
Intermittent Signals: Sorting Out Batteries, Range, and Interference
An intermittent remote is one of the most common reasons people call us, and it is also one of the easiest to misdiagnose. The door works from six feet away but not from the car, or it responds on Tuesday and ignores you on Thursday. Before assuming the remote is broken, it helps to work through the likely causes in order, since many of them cost nothing to check. A remote with a weak battery may still light its LED while transmitting too little power to reach the opener reliably.
Here is a simple sequence homeowners can try before scheduling a visit:
- Replace the remote's battery with a fresh one of the type printed on the device, and clean the contacts with a dry cloth if you see any green or white residue.
- Stand inside the garage with the remote and press the button. If the door responds there but not from outside, the issue is likely range, antenna placement, or obstruction rather than the remote itself.
- Check whether the problem happens with a second remote. If both fail, the opener's receiver or antenna is the more likely culprit.
- Note whether the failures cluster around certain times, such as after heavy rain, during a windy week, or near a neighbor's new wireless equipment.
- Confirm the opener's lights and safety sensors are working, since a door that closes partway or reverses unexpectedly can look like a remote problem when it is actually a sensor problem.
Interference is more common in dense neighborhoods than many homeowners expect. Wireless devices, nearby garage openers operating on the same frequency, and even some security systems can crowd the signal path. When we investigate interference, we look at the frequency the opener uses, the remote's transmit strength, and whether the antenna wire is hanging correctly and not tucked against metal framing or a metal garage door. Small adjustments to the antenna position often make a noticeable difference without any new hardware.
Programming a Replacement Remote Without Guesswork
Adding or replacing a remote is one of the more routine jobs we handle, but the process varies from one opener brand to another. Most modern openers have a "learn" button on the motor unit, usually near the antenna wire or behind a small cover on the bottom of the housing. Pressing it puts the opener into a short window in which it will accept a new remote code. The window is often only 30 seconds, so the technician needs to be ready to press the button on the new remote right after the opener indicates it is listening.
Each remote has to be matched to the opener's receiver, and the opener itself has to be compatible with the remote's technology. Some remotes are sold as universal and will work with several brands, while others are designed for one manufacturer's rolling-code system. Buying a remote that does not match your opener is one of the most expensive mistakes a homeowner can make, because the remote simply will not learn. Bring the opener's model number or a photo of the motor unit when you call, and we will confirm compatibility before you purchase anything.
Programming also includes testing. After a new remote learns the opener, we run the door through a full open and close cycle and confirm that the safety reversal works as intended. We also check that the new remote does not accidentally share a code with an existing one, which can happen if a previous owner's remote was never erased. The fee for programming falls within our $65 to $185 range, and the cost of the remote itself is separate, so ask us which model we recommend for your opener before you order.
When Your Keypad Won't Accept Your Code
A keypad that refuses your code is often less mysterious than it seems. The most common cause is a simple entry error, especially on keypads with small or closely spaced buttons, and it is worth trying again slowly before concluding anything is wrong. If the keypad still refuses the code, the keypad may have been reset, the code may have been changed by someone else in the household, or the keypad may have lost its memory after a power interruption. Some keypads also lock out for a few minutes after several failed attempts, and the keypad's indicator light usually shows when that has happened.
Keypad problems in Shoreline frequently trace back to moisture and corrosion. A keypad with sticky or unresponsive buttons, or one that works only when you press firmly in a certain spot, usually has contact wear behind the faceplate. Cleaning the exterior with a soft cloth helps, but the internal circuit is what needs attention. We open the unit, inspect the contacts, and replace the keypad when repair is not practical. Keypads mounted in exposed locations on Richmond Beach bluff-side homes tend to need replacement sooner than those tucked under an eave.
Reprogramming the keypad is typically straightforward once the hardware is confirmed good. The keypad will have a sequence involving a learn or program button, and the exact steps depend on the manufacturer. Many keypads let you set a new code of several digits, and we recommend choosing one that is not a birthday, a street number, or a simple repeating pattern. A good code protects the garage, and changing it periodically is a small habit that pays off, particularly if former tenants, contractors, or family members still know the old one.
Mounting an Exterior Keypad on Shoreline Siding
Homeowners who want to add an exterior keypad usually do so to avoid carrying a remote or to give a trusted family member, babysitter, or service provider access without a key. The location matters more than many people expect. Mounting the keypad where it is protected from the worst of the rain, out of direct spray from the driveway, and at a comfortable height for everyday use will extend its life considerably. In many of the older homes around North City and Echo Lake, the best spot is on the side of the garage frame or the entry wall rather than on a column exposed to the weather.
Installation involves a few practical steps. We confirm that the opener supports a wired or wireless keypad, since not every model does, and we check whether the keypad will connect to the opener's control board or use its own radio link. The wiring path matters too, because running low-voltage cable through siding requires a clean penetration sealed against moisture. Sealing a penetration properly is one of the details that separates a durable installation from one that leaks water into the wall within two winters. We use appropriate sealant and weatherproof fittings for exterior work.
Keypad installation does not change the door's safety features, and it should not. A keypad that operates the door must work alongside the opener's photo-eye sensors and auto-reverse function, and those safety features should remain active at all times. If a keypad installation ever seems to require disabling a sensor or bypassing a reversal feature, stop and call a licensed technician, because that workaround creates a real injury risk for children and pets. Our installation includes testing both sensors and reversal after the keypad is in place.
Pairing Your Car's HomeLink Buttons Step by Step
Many newer vehicles come with a built-in universal garage opener system, often branded HomeLink, that can replace the remote clipped to your visor. Pairing it with your garage opener is possible for most brands, but the process is specific to both the vehicle and the opener, and it is one of the places where homeowners most often get stuck. The car has to be parked in the garage or near the door during training, the engine typically needs to be running, and the opener's learn button must be pressed at the right moment. Doing these steps out of order usually produces a failed pairing that looks like a defect.
Newer openers and some car systems use rolling-code technology, which changes the transmitted code each time the button is pressed to prevent copying. This is a security improvement, but it can complicate pairing if the car's system predates the opener's protocol. In those cases, the car may need an adapter or a different programming method, and a few older vehicles cannot be paired with certain modern openers at all. We check the vehicle year, the opener model, and the car's built-in system before attempting training so that we are not wasting time on a combination that cannot work.
Once paired, the car button should open and close the door reliably from the driveway, and we confirm this during the visit. We also explain the training steps so that you can repeat them if you buy a new vehicle or lose the programming later. Pairing a second car is usually simple once the opener is set up, but it still requires its own training sequence. If your car's buttons work only intermittently, the cause is often the same range and antenna issues described earlier.
Lost Remote, Lost Control: Erasing Codes and Re-Securing Your Door
A lost remote is more than an inconvenience. Anyone who finds it, or who previously had access to it, could potentially open your garage, which is why we treat this call as a security matter. The fix is to erase the old codes from the opener so that the missing remote no longer works, then program replacements for the remotes you still have. Many openers have a clear or erase button on the motor unit, often held down for several seconds until an indicator light blinks or goes out. The exact procedure depends on the brand, and we always confirm the correct sequence against the manufacturer's instructions before erasing anything.
After erasing, we recommend a short checklist to make sure the door is fully secured:
- Erase all programmed remotes, keypad codes, and in-car pairings at the opener, not just the one you lost.
- Reprogram only the remotes you can physically account for, and label them so you know which ones are active.
- Change the keypad code if the lost remote was kept in the same place as the keypad's instructions or a written code.
- Review who has garage access, including household members, tenants, cleaners, and service providers, and update their devices or codes accordingly.
- Test the door from outside to confirm the old remote no longer operates it and the new ones do.
Erasing codes does not replace a physical security review. If the lost remote was kept in a car that was broken into, or if the garage was entered without permission, it may be wise to check the entry door lock and any side access as well. We are happy to point out simple improvements during the visit, but we also recognize that some security questions belong with a locksmith or a police report if a crime occurred. Our role is to make the garage door opener itself secure and working again.
Matching Frequencies and Rolling-Code Systems
Garage door remotes operate on radio frequencies, and the most common ones in residential systems are 315 MHz and 390 MHz. A remote must match the opener's frequency to communicate with it, and buying the wrong one is an easy mistake because the two look identical on the outside. The opener's model number, the label inside the motor unit cover, or the original remote's markings will usually tell you which frequency you need. If you are unsure, bring the old remote or a photo of the opener's label, and we will verify the match before any installation.
Rolling-code systems add a layer of security by sending a different code each time the remote is pressed, which makes replay attacks much harder. Most modern openers use this technology, and it is generally a good thing for homeowners. The tradeoff is that rolling-code remotes must be synchronized carefully with the receiver, and some third-party devices may not sync reliably. When we program a rolling-code remote, we test it several times to confirm it stays in sync, since a remote that drifts out of sync may stop working until it is retrained.
If your opener is old enough that it predates rolling-code technology, upgrading the opener itself may be worth discussing. We would not recommend a full replacement just for a remote problem, but if the opener is unreliable, uses outdated frequencies, or lacks basic safety features, a new unit can be a sound investment. We will give you an honest assessment of whether repair or replacement makes more sense for your specific system, and we will explain the tradeoffs without pressure.
What a Service Visit Covers and What It Costs
Our remote, keypad, and in-car pairing service typically falls between $65 and $185, and the final cost depends on what the visit involves. A straightforward remote programming job costs less than a keypad installation with new wiring, and a diagnostic visit for an intermittent system may land in the middle of that range once we know the cause. This pricing applies to the service itself. The cost of any new remote, keypad, or accessory is separate, and we will tell you the expected parts cost before you agree to anything.
During a visit, the technician checks the opener's receiver and antenna, tests every remote and keypad you have, inspects the safety sensors and auto-reverse function, and confirms the door operates smoothly. We also look at the door's overall condition as part of the visit, since remote problems sometimes coincide with wear on the door that we should mention. If we find a spring, cable, or track issue during the visit, we will explain it clearly and recommend a licensed professional for that work, because springs and cables store significant energy and should never be adjusted by an untrained person.
Our technicians are licensed, bonded, and insured, and that matters for any work near the door's mechanical parts. We do not recommend that homeowners attempt spring or cable repairs themselves, and we will not perform work outside the scope of the service you requested without your approval. Clear communication about cost and scope is part of how we operate, so you will always know what is being done and why before the technician starts.
Keeping Remotes and Keypads Working Through Seattle-Area Weather
A little preventive attention goes a long way in a climate like ours. Replacing remote batteries once a year, ideally at the same time you change smoke alarm batteries, avoids the slow drain that causes many intermittent failures. Keeping remotes in a dry location rather than a car door pocket or an exposed console reduces moisture exposure, and storing spare remotes indoors protects them from the damp garage air. These habits cost almost nothing and prevent a surprising number of service calls.
Exterior keypads benefit from a simple seasonal check. In late fall, before the heaviest rain, wipe the faceplate, look for water spots or condensation inside the lens or behind the cover, and make sure the mounting screws are snug. Trim back vegetation that presses against the keypad or traps moisture against the wall, since shrubs near the driveway can hold water and keep the surface damp for days after a storm. If you notice a button sticking or a digit failing, address it promptly rather than waiting for the keypad to fail completely.
Finally, keep a written record of your opener's model, remote frequency, and the keypad code stored somewhere safe, not taped to the garage wall. When you call us with that information, we can usually diagnose the problem faster and arrive with the right parts. If you are in Shoreline and your remote, keypad, or car opener is giving you trouble, a quick visit is often all it takes to get your door working reliably again. Call (888) 799-3819 to schedule service, and we will walk you through what to expect before we arrive.