
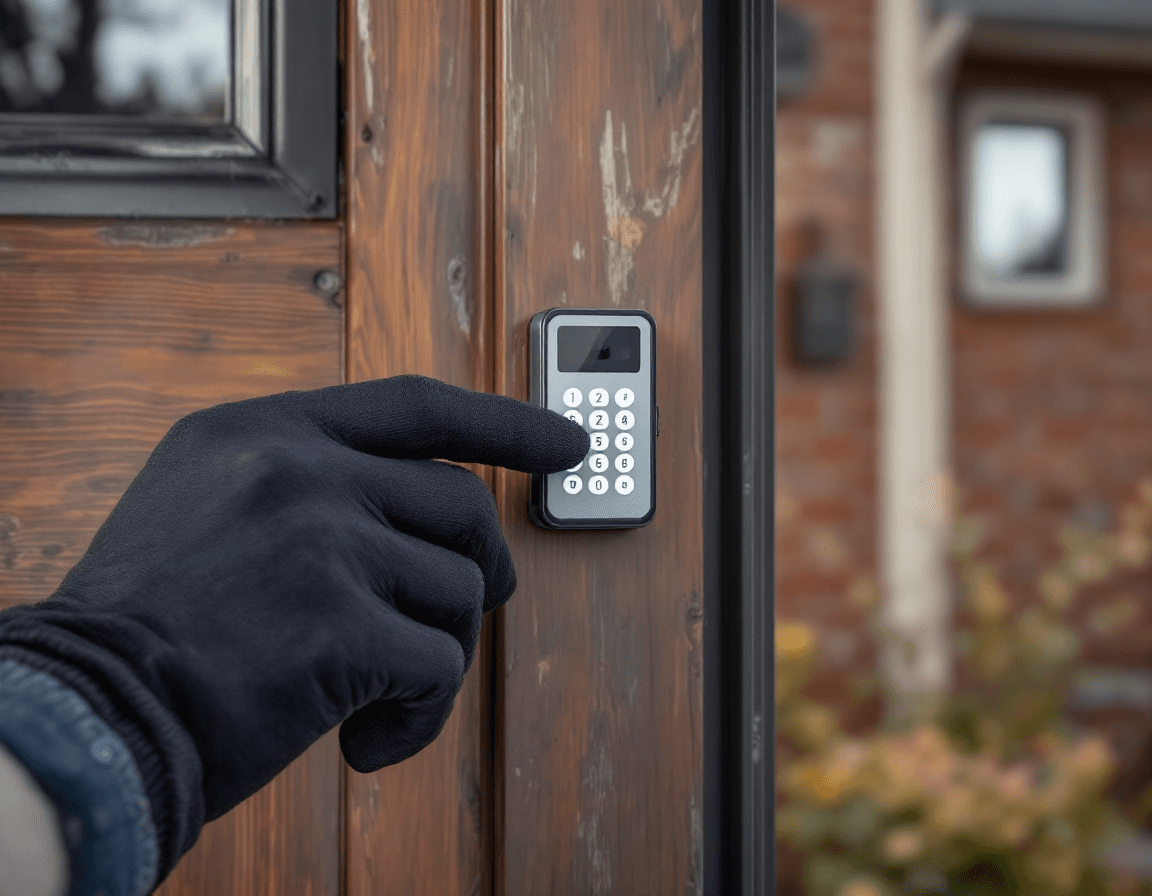
Garage door remote and keypad service in SeaTac, WA is one of the most common reasons homeowners call us, and it is often the cheapest fix on the list. A remote that worked fine in August can quit in January, and a keypad that accepted your code last spring may suddenly reject it. Our technicians handle remote programming, keypad installation and troubleshooting, and in-car opener pairing for households across SeaTac, including the residential streets near Angle Lake, the hillside blocks of McMicken Heights, and the neighborhoods that border Bow Lake. Pricing for this work runs $65 to $185 depending on what needs to be done, plus the cost of any new remote or keypad.
Most of the problems we see in SeaTac are not mysterious once someone looks at the right part of the system. The remote, the receiver on the opener, the wall control, and the keypad each use their own radio or electrical path, and a failure in one can look exactly like a failure in another. That is why a good visit starts with diagnosis rather than a quick reprogram. We want to know which device is misbehaving, whether the opener is receiving the signal at all, and whether the problem is a battery, a setting, or something that needs more attention.
If you are reading this because the door is currently stuck outside or you cannot get into the garage, call us at (888) 799-3819 and we will walk you through what to check while we schedule a visit. The rest of this page explains what we look for, what we can fix on the spot, and where the line sits between remote work and the spring and cable work that should only be handled by a licensed professional.
Why Remotes Fail More Often During SeaTac's Wet Winters
Western Washington's damp, mild winters are hard on small electronics. Condensation can form inside a remote's case when it lives in a jacket pocket, a car door, or a cold garage shelf and then moves into a warm house, and moisture can corrode the battery contacts over time. Many remotes also have rubber button pads that trap water along the seams, which can cause a button to register weakly or stop registering at all. We see this most often in cars parked in driveways under evergreens, where the remote spends the rainy season in a damp cabin.
Battery life is another factor that surprises people here. Garage remotes typically run on small coin cells, and a cell that has been sitting in a cold vehicle for months may test fine on a multimeter yet deliver too little current to send a strong signal. The result is a remote that works at arm's length in the driveway but fails when you are at the end of the block or when the car is parked at an angle to the door. Replacing the battery is always the first thing we try, and it solves a surprising share of intermittent complaints.
Seasonal changes also shift the way the opener's receiver hears the remote. Tree growth, new construction nearby, and the metal framing of a neighbor's carport can all reduce range over time without any change to your equipment. When a remote worked reliably for years and suddenly does not, the cause is often environmental, and we can usually confirm that during a short visit.
Reading the Signs: Intermittent Remotes Versus Dead Ones
A remote that works sometimes and fails other times is a different problem from one that has stopped completely, and the distinction matters for how we approach the repair. Intermittent operation usually points to a weak battery, moisture in the housing, a worn button contact, or a receiver that is picking up interference from another device. A remote that never responds may have a dead battery, a broken circuit board trace, or a receiver that has lost its programmed codes. Paying attention to exactly when the failure happens gives us useful clues before we open anything.
Here is a quick way to sort what you are seeing. Write down whether the remote fails at a distance, close to the door, or only in certain weather. Note whether the indicator light on the remote blinks when you press a button, since a dark or dim light often means the battery is the issue. Also check whether the wall control and the keypad still work, because if they do, the opener and its receiver are probably fine.
- A remote that works up close but not from the driveway usually has a weak battery or a range issue.
- A remote that works only after you press the button several times often has a worn contact or moisture inside the housing.
- A remote with a dark indicator light is most often a battery replacement away from working again.
- A remote that fails everywhere while the wall button works points to a dead remote or a code that has dropped from the opener.
Including these details when you call helps our dispatcher decide what parts to bring, which keeps the visit efficient and avoids a second trip.
Replacement Remotes: Matching Frequency, Code Type, and Button Count
Buying a replacement remote sounds simple, but a remote that does not match your opener will never work no matter how carefully it is programmed. Most residential openers sold in the last few decades use rolling code technology, which changes the transmitted code every time a button is pressed so that a captured signal cannot be replayed. Older openers may use fixed codes, and both families operate on specific radio frequencies, most commonly 315 MHz or 390 MHz in the United States. A remote on the wrong frequency or with the wrong code protocol will simply stay silent.
Before we order a replacement, we confirm the opener's brand and model, check the frequency printed on the existing remote or the receiver's label, and identify how many buttons you need. Some households want a visor clip, a keychain model, or a multi-door remote that can operate a second garage door. Others prefer a remote that matches a wall control they already like. We can also discuss whether a universal remote would work for your setup, though we usually recommend an OEM or direct-match replacement because it tends to hold a stronger, more reliable connection with the receiver.
Programming a new remote takes only a few minutes once the correct unit is in hand. The process generally involves pressing a learn button on the opener's motor unit, then pressing the remote button within a set time window until the opener's lights flash or the door responds. Because the steps differ between manufacturers and model years, we confirm them on site rather than relying on generic instructions. If your opener is older and has no learn button, we will explain your options clearly before any parts are purchased.
Keypads That Reject a Code You Know Is Right
A keypad that refuses your code is one of the more frustrating problems a homeowner can face, especially when the door is closed and everyone is standing outside in the rain. The cause is usually a short list of possibilities: the code was entered incorrectly, the keypad's internal memory was reset, a battery in a wireless keypad is low, or the keypad's receiver has lost its connection to the opener. Wired keypads can also fail when a connector loosens or a wire is pinched during a previous service call.
We begin by checking the keypad's power source and whether it lights up when you press a key. If it does not respond, the battery or wiring is the first place we look. If the keypad lights up but rejects the code, we verify the code length and whether the keypad uses a master code, a user code, or a time-limited code, since some models have settings that disable entries after several failed attempts. Some keypads also have a brief lockout period after repeated mistakes, which can make a correct code appear to fail.
Resetting a keypad is sometimes necessary, but it erases every stored code, so we only recommend it after simpler checks are complete. When a reset is the right move, we set a new master code, add user codes for each person who needs access, and test every entry from inside and outside the garage. Writing the new codes down in a secure location, not on the keypad or the garage wall, helps prevent a future lockout.
Adding an Exterior Keypad by the Side Entry or Front Walk
Many SeaTac homeowners want a keypad installed on an exterior wall so family members, housekeepers, or contractors can enter without a remote. This is a practical upgrade, particularly for households with teenagers who forget keys or for homes where the garage is the main entrance. A keypad also reduces the number of remotes that have to be carried, stored, and eventually replaced after they are lost. Placement matters, though, because a keypad mounted in direct sun, under a dripping eave, or in a spot where it collects standing water will age faster and cause more problems.
When we install an exterior keypad, we look at the wall material, the distance to the opener's control circuit, and whether a wired or wireless model is the better fit. Wired keypads offer a stable connection but require running low-voltage wire through the wall or along a protected path, while wireless models avoid that work but depend on battery life and signal strength. In SeaTac's wet climate, we typically prefer a weather-rated housing with a sealed gasket and a small drip shield above it. We also recommend mounting it at a height that is comfortable for everyone in the household and out of reach of casual tampering.
A keypad installation includes mounting, wiring or pairing, programming the initial codes, and testing the door from both sides. We also show you how to change codes, how to remove a user, and what the keypad's indicator lights mean. If you are considering a keypad on a shared wall or a townhome with a common exterior, we can help you think through how the location affects both convenience and security.
Pairing Your Car's HomeLink Buttons Without Guesswork
Many newer vehicles include a built-in universal transmitter that can be trained to open a garage door, often marketed under the HomeLink name. Owners often assume that once the car is paired, the feature will work forever, but changes to the opener, a new car, or a rolling code update can break the connection. Pairing the buttons correctly is more about following the right sequence for your specific car and opener than about any special tool, and the steps vary widely between manufacturers and model years.
The general process involves holding the car's programming button while pressing the remote or the hardwired button on your opener, watching for a signal light, and then pressing and holding the car's button until the door responds. Some systems require you to press the car button, then the existing remote, and then a short cycle of button presses before the training is complete. Some newer openers use a different rolling code standard that requires an extra step on the car side, which is why we recommend confirming the exact model before you try it yourself.
If you have tried pairing and the buttons still do nothing, the problem may be the vehicle's battery, the opener's learn mode timing, or a compatibility issue between the car system and the opener. We can usually identify which one is causing the problem during a visit. We are also happy to pair a second car or a second set of buttons at the same time, which saves a separate trip when multiple vehicles share a garage.
Lost Remote Scenarios and Locking Down Access
A lost remote is more than an inconvenience. Anyone who finds it and has access to the same opener frequency could potentially open the door, which is a real concern for homes in busy neighborhoods, near shared parking areas, or close to the airport traffic corridor where people come and go constantly. The security question is not only whether the lost remote still works but whether you can remove it from the system entirely. Many openers store a list of authorized remotes, and erasing that list is the most reliable way to block a lost unit.
Our recommended approach is to clear the opener's memory of all previously learned remotes and then reprogram only the devices you still have in hand. Clearing memory is a quick step on most units, but it means every remote, keypad code, and vehicle button must be reprogrammed afterward, so we plan the visit to cover everything at once. We also suggest checking whether the opener has a rolling code counter that can be reset as part of the process, and we confirm that wall controls and keypads still operate correctly before we leave.
Once the system is reset, we talk through practical steps to keep it secure. These include keeping spare remotes in a locked location, avoiding leaving a remote in an unattended vehicle, and reviewing which household members still need access. If someone has moved out or a contractor no longer needs entry, removing their remote or code is one of the simplest and most effective security steps a homeowner can take.
What a Remote and Keypad Visit Typically Covers
A standard visit for remote and keypad work is designed to resolve the issue in a single appointment whenever possible. We arrive with common replacement remotes, batteries, and basic keypad components, and we test the existing equipment before recommending any purchase. Our goal is to explain what we found in plain language, show you the fix, and confirm that everything works before we leave. The visit is priced between $65 and $185 depending on the complexity of the job and the number of devices involved.
- Diagnosis of the remote, receiver, wall control, and keypad to identify the failing component
- Battery replacement and cleaning of remote contacts where corrosion or moisture is present
- Programming of replacement remotes, including matching frequency and rolling code requirements
- Keypad troubleshooting, code entry testing, and reset when necessary
- Installation of exterior keypads with weather-appropriate mounting and testing from both sides
- In-car opener pairing for compatible vehicles, including HomeLink-style systems
- Clearing lost or unauthorized remotes from the opener's memory and reprogramming authorized devices
Any new remote or keypad hardware is billed separately, and we will quote those parts before installing them so there are no surprises at the end of the visit.
Understanding Pricing and What Drives the Final Cost
Our pricing for remote and keypad service in SeaTac runs from $65 to $185 for labor and diagnosis, with the final figure depending on the work involved. A simple battery swap and a single remote programming session usually fall at the lower end of the range. Multiple remotes, a full memory reset with reprogramming of several devices, or a new exterior keypad installation that requires running wire will move the total toward the higher end. Vehicle pairing for more than one car also adds time, which affects the final quote.
The cost of hardware is separate from labor. A replacement remote, a wireless keypad, or a wired keypad kit each has its own price depending on brand, features, and whether it matches your existing opener. We do not add markups that are hidden in the labor line, and we explain each part before it goes on the truck or into your garage. If you already have a remote or keypad on hand that you purchased elsewhere, we will check compatibility before we install it so you know it will work.
For many homeowners, the most cost-effective decision is to address the root cause rather than repeatedly replacing batteries or remotes. If a single remote keeps failing, we will look for moisture, a worn contact, or a range problem that a new unit alone would not fix. Asking for a clear explanation at the start of the visit helps you decide what makes sense for your budget and your household.
Staying Safe: Where Remote Work Ends and Spring Work Begins
Remote and keypad service is low-voltage, radio-based work that most homeowners can understand, but the same garage door system contains components that carry serious risk. Torsion springs and extension springs store enormous mechanical energy, and a broken spring can injure someone or damage the door and opener. Cables, drums, and bearings are under similar tension and should never be adjusted by someone without the right training and tools. We recommend that any spring, cable, or track issue be handled by a licensed professional rather than attempted as a do-it-yourself project.
When we visit for remote or keypad work and notice signs of spring or cable wear, such as a door that is off balance, a visibly stretched or frayed cable, or a gap in a spring coil, we will stop and tell you what we found. We will not perform spring or cable repairs as part of a remote visit, but we will explain the risk and recommend the appropriate next step. This keeps the visit focused on what you asked for while making sure you know about any safety concerns we see along the way.
Until a professional can inspect the door, keep the door disconnected from the opener if it is binding or moving unevenly, and keep children and pets away from the door's path. Avoid leaning on the door, pulling it by hand while the opener is running, or trying to adjust tension yourself. Taking these precautions protects your household while you arrange for proper service.
Quick Checks You Can Do Before You Call
Several simple steps can help you narrow down a remote or keypad problem before a technician arrives, and they often resolve the issue entirely. Start by replacing the battery in the remote using the correct type printed inside the case, and make sure the battery is seated with the correct polarity. Clean the contacts gently with a dry cloth or a cotton swab if you see corrosion, and let the remote dry completely if it has been exposed to rain or condensation. Then test the remote from several distances and angles to see whether the failure is consistent.
Next, check the wall control and the keypad, since their behavior tells you a lot about where the problem is. If the wall button works and the remote does not, the remote or its battery is the likely cause. If the keypad does not light up at all, check its power source or wiring connections. If the opener's indicator light is off when you press any control, the issue may be power to the opener itself, which is something to mention when you call.
Finally, make a short list of what you have: the opener brand if it is visible on the motor unit, the remote model number if you can read it, the number of devices that need to work, and whether you have a car that supports in-car pairing. Sharing this information with our dispatcher lets us bring the right parts and plan a single efficient visit. For anything involving springs, cables, or door balance, leave that work to a licensed professional who can inspect the system safely.
Whether your remote is acting up, your keypad keeps rejecting a code that should work, or you want to add an exterior keypad for easier family access, our SeaTac team can help. Call Seattle Garage Door Fix at (888) 799-3819 to describe what is happening, and we will schedule a visit that fits your day and gets you back inside the garage with confidence.