
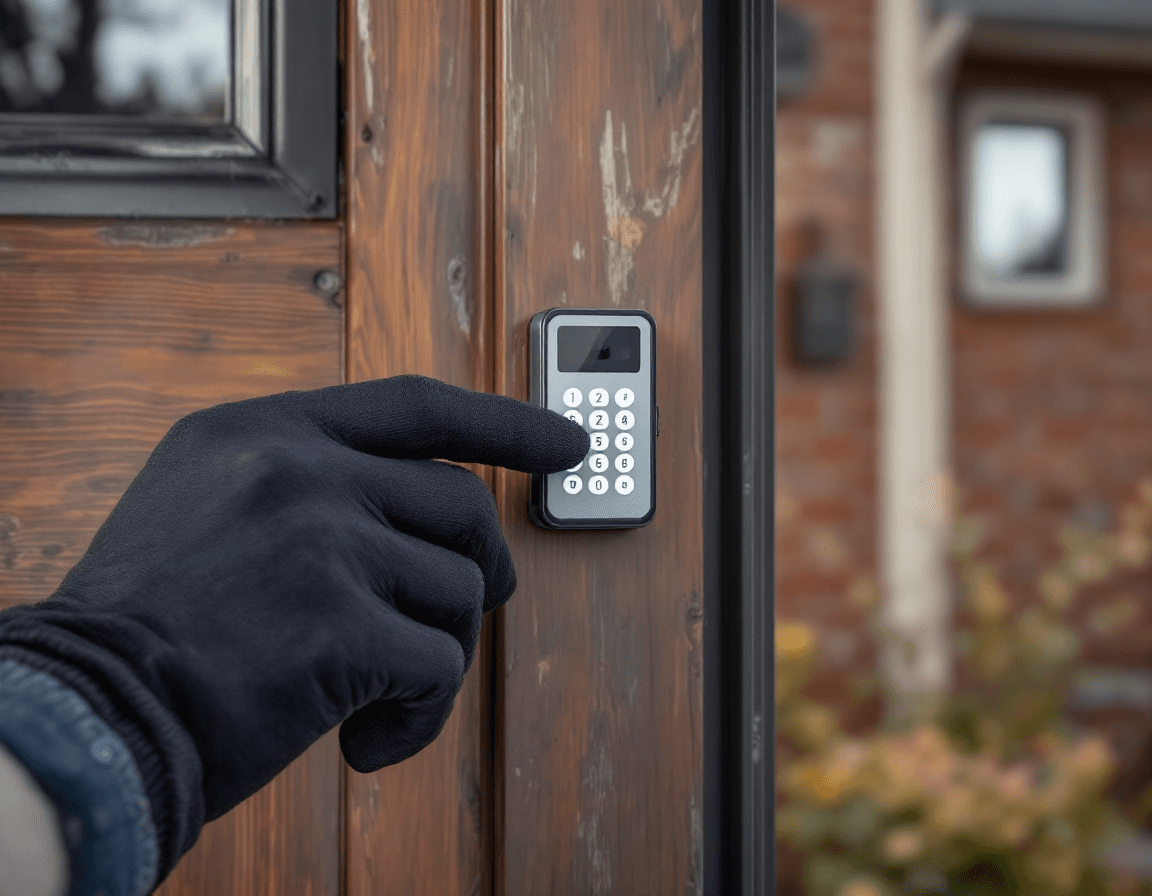
Garage Door Remote & Keypad Service in Yarrow Point, WA is one of the most common calls we take from homeowners on the peninsula, and it is often the cheapest fix that solves the biggest daily annoyance. A remote that works from the driveway but not from the car, or a keypad that rejects a code you have used for years, can turn a quick trip home into a frustrating routine. Most of these issues come down to batteries, signal interference, a worn button, or an opener that has lost track of which transmitters it should trust. A focused visit usually resolves them in one appointment.
Yarrow Point sits on a narrow stretch of Lake Washington's eastern shore in King County, and the homes here tend to be set back on long drives, tucked behind mature evergreens, or built close to the water. Those features matter when we diagnose remote problems. Thick cedar and fir canopies, sloped lots, and detached or side-entry garages can all weaken the signal between a handheld remote and the opener's receiver. Add the humid, drizzly months that Western Washington is known for, and you have a set of conditions where a remote that worked perfectly in July can start acting up by November. This page explains what we check, what it typically costs, and what you can safely try yourself before you call.
If you are reading this because your garage door will not respond at all, you are in the right place. Our technicians arrive with programming tools, replacement remotes and keypads from several manufacturers, and the test equipment needed to confirm that the opener is receiving a clean signal. We cover remote programming, keypad installation and troubleshooting, and in-car opener pairing for most residential systems. The price for these services runs from $65 to $185, plus the cost of any new remote or keypad you choose to add. We will tell you what the work involves before we start.
Why Lake-Side Humidity Plays a Role in Remote Performance
The air along the Lake Washington shoreline carries more moisture than many homeowners realize, and that moisture finds its way into small electronics. A handheld garage remote is a sealed plastic shell with a circuit board, a tiny coin-cell battery, and rubber or silicone contact pads under each button. Over several seasons of damp air, those contacts can oxidize or pick up a film that prevents the button from completing its circuit. The result is a remote that works when you press it firmly a second time, which is a classic symptom we hear constantly. Condensation inside a car's visor or a cup holder can produce the same effect when a visor-mounted transmitter is involved.
Temperature swings add another layer of stress. A remote left in an unheated garage during a cold snap may lose battery output temporarily, then appear to recover on a milder afternoon. Homeowners in Yarrow Point often store a spare remote in a coat pocket, a boat bag, or a glovebox, where heat and cold cycle more dramatically than in a closed house. We have found that intermittent behavior is more often a battery or contact issue than a failing opener, which is why we always test the remote before replacing anything.
Water exposure during a rinse of a muddy jacket or a splash from a dock visit can also reach the remote if it is carried clipped to a bag. Dry the remote with a soft cloth, remove the battery, and let it air out before testing it again. If the buttons still feel sticky or the LED stays dim after you install a fresh battery, the remote likely needs replacing rather than repairing.
Reading the Signs: Intermittent Remotes and Dying Batteries
Most remote complaints begin with a pattern rather than a dead remote. The door responds from ten feet away but ignores you at the end of the driveway, or it works in the morning and fails after dark. Those patterns usually point to range, battery voltage, or an obstruction in the path between the transmitter and the opener's antenna. Yarrow Point driveways that curve around large trees or run beside a steep bank can create dead zones that catch even a healthy remote off guard.
Before we visit, it helps to notice a few details. Note whether the LED on the remote lights when you press a button, whether the problem affects one button or all of them, and whether the door responds to the wall button inside the garage. Those three observations separate a weak battery from a damaged button, and they separate a remote problem from an opener problem. A short checklist can speed up the appointment and keep the cost of the visit where it belongs.
- Replace the coin-cell battery (commonly a CR2032 or CR2025) with a fresh one from a reputable brand, and make sure the battery is seated with the correct polarity.
- Clean the battery contacts and the rubber button pads with isopropyl alcohol and a cotton swab, then let them dry fully before reassembling.
- Test the remote within a few feet of the door, then again from the far end of the driveway, to see whether range is the real issue.
- Confirm the wall-mounted control works. If it does and the remote does not, the problem is almost certainly in the remote or its programming.
- Check for obvious obstructions such as a new metal shelf, a parked trailer, or a hanging storage rack that might sit between the remote and the opener.
If the remote still behaves erratically after these checks, a technician can measure the signal strength and decide whether reprogramming or replacement makes sense. We never recommend replacing a remote that only needs a new battery, and we will tell you when a simple cleaning is enough.
When a Keypad Refuses Your Code
A keypad is a convenient alternative to carrying a remote, especially for family members, house-sitters, or a dog walker who needs in-and-out access. When a keypad stops accepting your code, the cause is usually one of four things: the code was never saved correctly, the keypad's internal memory was reset, the keys are worn, or the opener's receiver has been replaced or reset since the keypad was last used. Many keypads also have a lockout feature that disables input for a short period after several failed attempts, which can make a working code look broken.
Start by confirming the exact code and the number of digits your keypad requires. Some models accept four digits, while others accept up to six or more, and a few use a separate programming sequence that differs from the entry sequence. If the keys feel mushy or some numbers respond while others do not, the membrane underneath may be worn, and the keypad should be replaced rather than reprogrammed. Water intrusion around the keypad housing is common on exterior-mounted units exposed to driving rain, so inspect the seal and the wiring gasket as well.
Keypads mounted on the exterior wall of a Yarrow Point home are usually exposed to direct weather, sprinkler overspray, and leaf debris that collects in the seams. We often find that moisture has corroded a connector or that a loose wire has shifted after a windy storm. A technician can open the cover, test continuity, and reseat the connection without disturbing the rest of the opener. If the keypad is more than a few years old and the housing shows cracks or fading, a replacement with better weather sealing is often the more reliable long-term choice.
Adding an Exterior Keypad Without Cluttering the Entry
Many homeowners decide to add an exterior keypad after they lose a remote, after a teenager starts driving, or after a contractor needs repeated access during a renovation. Installing a keypad is a practical upgrade, but placement matters. The keypad should be reachable from the driver's seat with a window down, mounted at a height that is comfortable for most adults, and protected from direct rain and the worst of the lake wind. Some Yarrow Point properties have a garage that sits right next to the entry walk, while others require a short walk down a long drive, and the best location depends on how you actually come and go.
Wiring is the other consideration. Most keypads connect to the opener through a low-voltage pair of wires, and the run needs to be protected from moisture and physical damage. We route the cable through existing conduit when possible, use outdoor-rated connectors, and seal the wall penetration so that water cannot track into the wall cavity. Wireless keypads avoid the wiring question, but they still need a clear radio path to the opener and a fresh battery schedule that you can actually keep up with.
Keep the number of codes manageable. Assign a unique code to each person who needs access, and remove codes when a person no longer needs them. If your keypad supports temporary or timed codes, consider them for contractors and guests. Writing codes on a card kept in the house is safer than posting them on the wall beside the keypad, where anyone walking past can read them.
In-Car Pairing and HomeLink Button Setup
Many newer vehicles and aftermarket systems include built-in universal opener buttons, commonly known by the HomeLink name. These buttons can replace the clip-on remote entirely, but they only work after the car's system has been trained to match the opener's frequency and code type. Homeowners frequently tell us the buttons were working after a dealership visit, then stopped after a battery change in the car, a software update, or a change in the garage opener. Other times the training process simply was never completed correctly, and the car is still trying to talk to an old opener.
Pairing typically involves holding the car's button, placing the original remote about an inch or two from it, and pressing the remote button until the indicator changes. Some systems require you to hold the button for a longer period, and some newer rolling-code openers require a secondary step where you press the opener's learn button in the garage. Because the procedure varies by vehicle year, make, and opener brand, we confirm the exact steps before we begin. We are not able to promise that every vehicle system will accept every opener, but we can usually determine quickly whether the car, the opener, or the remote is the bottleneck.
If your vehicle is parked in a driveway with a slope, make sure the car is in park with the parking brake engaged before you begin any programming. Keep hands and tools clear of the door track. Do not try to trigger the opener while standing in the door's path, and do not lean into the garage to reach a learn button while the door is moving.
Lost Remote Security and Re-Securing the Door
A lost remote is more than an inconvenience. Anyone who finds it may be able to open the garage, and in a neighborhood where people park boats, bikes, and lawn equipment inside, that is a real security concern. Many openers can erase lost transmitters from memory, which means the old remote no longer opens the door even if it is still in someone else's pocket. The process varies by brand, but it usually involves pressing and holding the learn button on the opener until an indicator light changes, then reprogramming the remotes you still have.
We recommend clearing the memory whenever a remote is lost, stolen, or left with a former tenant or service provider. Once the memory is cleared, reprogram only the remotes you can account for and add new ones as needed. This simple step closes a gap that many homeowners never think about. While we are on site, we can also review whether the opener has a rolling-code system, which makes captured signals far harder to reuse, and whether any keypad codes or keychain transmitters should be retired at the same time.
Security also depends on how the door is closed and locked. If your opener has a manual release, make sure the cord is intact and the handle is in good condition, and keep the release cord out of reach of a window or open car. If you notice the door opening on its own, closing unexpectedly, or reversing without cause, schedule a service visit promptly. Those symptoms can indicate a sensor problem or an opener fault that should not be ignored.
Understanding Frequency, Rolling Codes, and Why Remotes Do Not Always Match
Garage door remotes communicate with the opener on specific radio frequencies, and many residential systems in the United States use either 315 MHz or 390 MHz transmitters, depending on the manufacturer and the year the opener was built. A remote designed for one frequency generally cannot control an opener set for another, even if the buttons look identical. Most modern openers also use rolling-code encryption, which changes the transmitted code every time the button is pressed so that a captured signal cannot be replayed. That design improves security, but it also means the opener and remote must stay synchronized.
Synchronization can drift after many button presses from a remote that is used out of range, after a battery change in a remote that was not properly reset, or after the opener has been unplugged during a storm. When that happens, the remote may fail to respond until the opener is re-trained. Experienced technicians check the frequency, the code type, and the remote's programming history before deciding how to proceed. Buying a generic remote online without confirming compatibility is one of the most common ways homeowners end up with a device that simply will not pair.
We carry a range of compatible remotes and keypads, and we can verify the correct model before we order a replacement. When we are on site, we label the opener's learn button location, note the model, and provide the information you need to buy the right remote if you want to order one yourself. If you already own a remote that you suspect is the wrong type, bring the model number or a photo of the label, and we will help you check it.
Pricing, What the Visit Covers, and What Costs Extra
Our remote and keypad service typically falls between $65 and $185, depending on the work involved. A simple remote programming session, a battery and contact cleaning, or a quick lost-remote memory clear sits at the lower end of that range. Keypad installation, weatherproofing an exterior keypad, troubleshooting a wiring fault, or completing an in-car pairing that requires several attempts can move the visit toward the upper end. The price does not include the cost of any new remote or keypad, which is billed separately so that you can see exactly what you are buying.
We believe in telling you the scope before work begins. If the technician finds that the opener itself is failing, that a sensor is misaligned, or that a safety reversal system needs adjustment, we will explain the issue and the options, and we will not proceed with additional repairs without your approval. Many homeowners prefer to know whether a remote problem is actually a symptom of a larger issue, and we are happy to provide that clarity.
If you are weighing a remote replacement against a full opener upgrade, ask us to walk through the tradeoffs. A new remote is the right answer when the opener is healthy and the transmitter is the problem. An upgrade may make more sense when the opener is old, noisy, or no longer supported by replacement parts. We can give you an honest comparison based on what we find, not on a sales target.
Safety Limits: Leave Springs, Cables, and Opener Mounting to Licensed Professionals
Remote programming, keypad wiring at the low-voltage level, and in-car pairing are tasks that most capable homeowners can handle with care. Garage door springs, cables, drums, and high-tension hardware are a different matter. Torsion springs store enough energy to cause serious injury, and extension springs and cables can snap under load. Any work that involves removing tension, adjusting spring hardware, or replacing a cable should be performed by a licensed and insured professional with the right tools and training. Please do not attempt spring or cable repairs yourself, even if a video makes the process look simple.
Opener mounting is another area where caution matters. Ceiling brackets, rail alignment, and header connections all bear significant loads, and a loose mount can allow the door to fall or the opener to detach. If your remote problem is accompanied by vibration, rattling, or a door that moves unevenly, stop using the door and schedule a service visit. When in doubt, keep the door closed, keep people and vehicles clear of the path, and call us for an inspection.
Our technicians are licensed, bonded, and insured, and we will tell you clearly when a repair falls outside the scope of a remote or keypad visit. We would rather recommend a separate appointment for a spring or cable issue than attempt work that puts you or your family at risk.
Scheduling Your Visit and Preparing the Garage
A few preparations make a remote and keypad visit faster and more accurate. Gather every remote, keypad, and visor transmitter you have, along with any owner's manuals or model labels you can find. Note which devices work and which do not, and try to recall any recent events such as a battery change, a power outage, a car repair, or a move. If the garage has a car parked inside, please move it to the driveway so the technician has room to work safely and can test the door from both inside and outside.
Clear the area around the wall control and the opener, and make sure the door's path is open. If children or pets are likely to wander into the garage during the visit, ask them to stay inside. Having the homeowner or an authorized adult present is helpful, especially when we need to test in-car pairing or confirm which remotes should be kept active.
We serve Yarrow Point and the surrounding King County communities from our local dispatch, and we will confirm your arrival window when you call. For same-day remote problems, describe the symptoms in as much detail as you can so the technician can bring the right parts and tools. Call us at (888) 799-3819 to schedule remote programming, keypad installation or troubleshooting, or in-car opener pairing in Yarrow Point. We will help you get your garage door responding reliably again, with clear pricing and a technician who will explain every step before any work begins.